
Milk balls are perfect for festivals, parties, or when you want something sweet. Kids love them because they’re soft and tasty, and adults love them because they’re easy to make.

Milk balls are soft, sweet treats that melt in your mouth. They are very popular in India and other South Asian countries. These little white balls are made with simple ingredients you have at home. The best part? You only need a few things and they’re ready in 45 minutes!
Milk balls are not just desserts – they’re little bites of happiness. In Indian homes, they appear at every celebration, from Diwali lights to birthday parties. They’re the kind of sweet that brings people together around the table, sharing stories and smiles.
What makes them perfect for home cooks is how forgiving they are. Even if you’re new to Indian sweets, this recipe gives you that authentic taste without complicated steps. The ingredients are simple, the method is straightforward, and the results always impress.
These treats also make wonderful gifts. Pack them in small boxes or bags, and you have a homemade present that shows you care. They stay fresh for several days, making them ideal for preparing ahead of time.
What You Need
For the Milk Balls:
- 300ml whole milk
- 1 tablespoon sugar
- 75g all-purpose flour
- 1/2 teaspoon cardamom powder (optional)
For Decoration:
Few chopped pistachios (optional)
1/4 cup milk powder
How to Make Milk Balls
Put flour and sugar in a small bowl. Use a fork or spoon to mix them together. Make sure there are no lumps. Break any lumps you see with the back of the spoon. This step is important because lumpy flour will make lumpy milk balls.
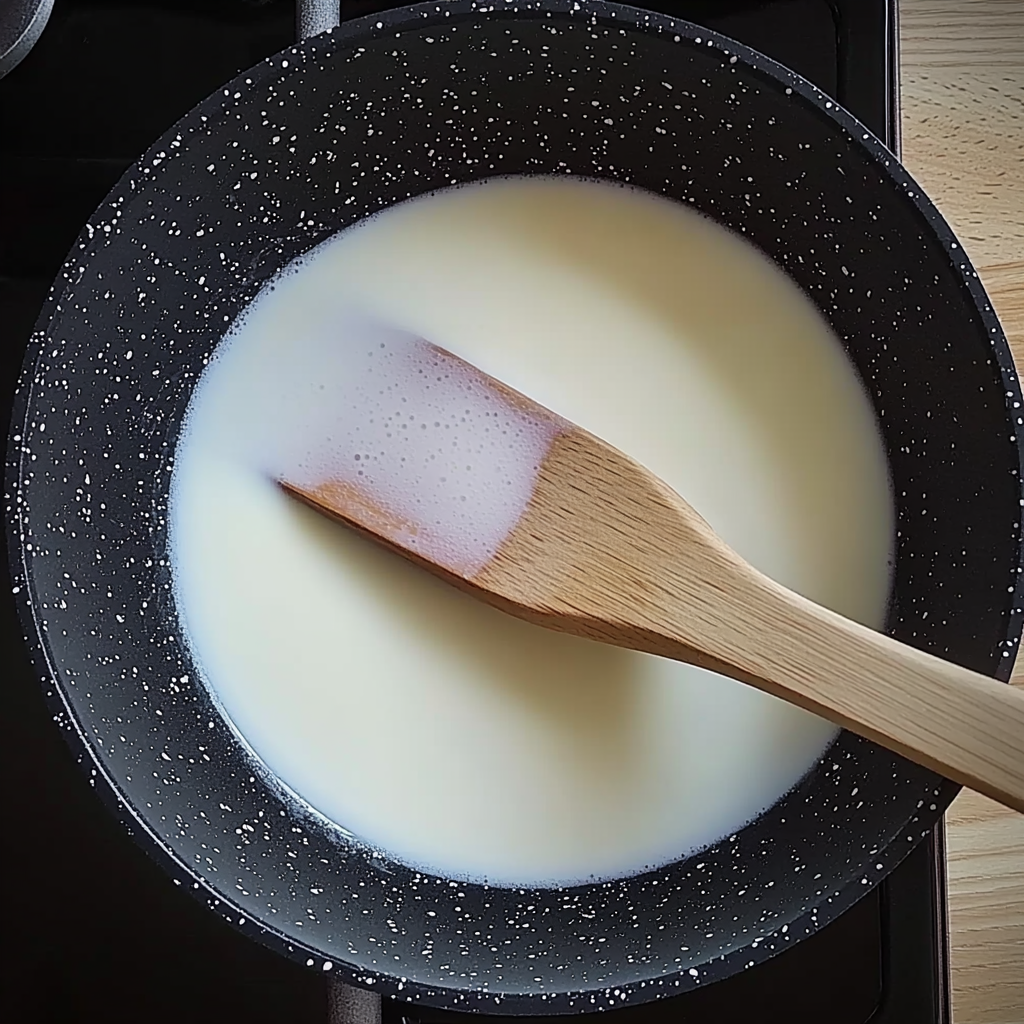
Pour 300ml milk into a heavy-bottomed pan or non-stick pan. Put it on medium heat. Watch the milk carefully. You will see small bubbles forming at the edges when it’s getting warm. Don’t walk away from the stove because milk can overflow quickly.
When you see the milk is warm and steaming, it’s time to add flour. Take the pan off the heat for a moment. Add the flour and sugar mix little by little. Add only one spoon at a time. Stir quickly with a wooden spoon or whisk. This prevents lumps from forming. Put the pan back on low heat.
Now comes the most important part. Keep the heat on low-medium. Stir the mixture without stopping. Use a wooden spoon and scrape the bottom of the pan as you stir. The mixture will look thin at first, then it will slowly get thicker. This takes patience – don’t turn up the heat or it will burn.
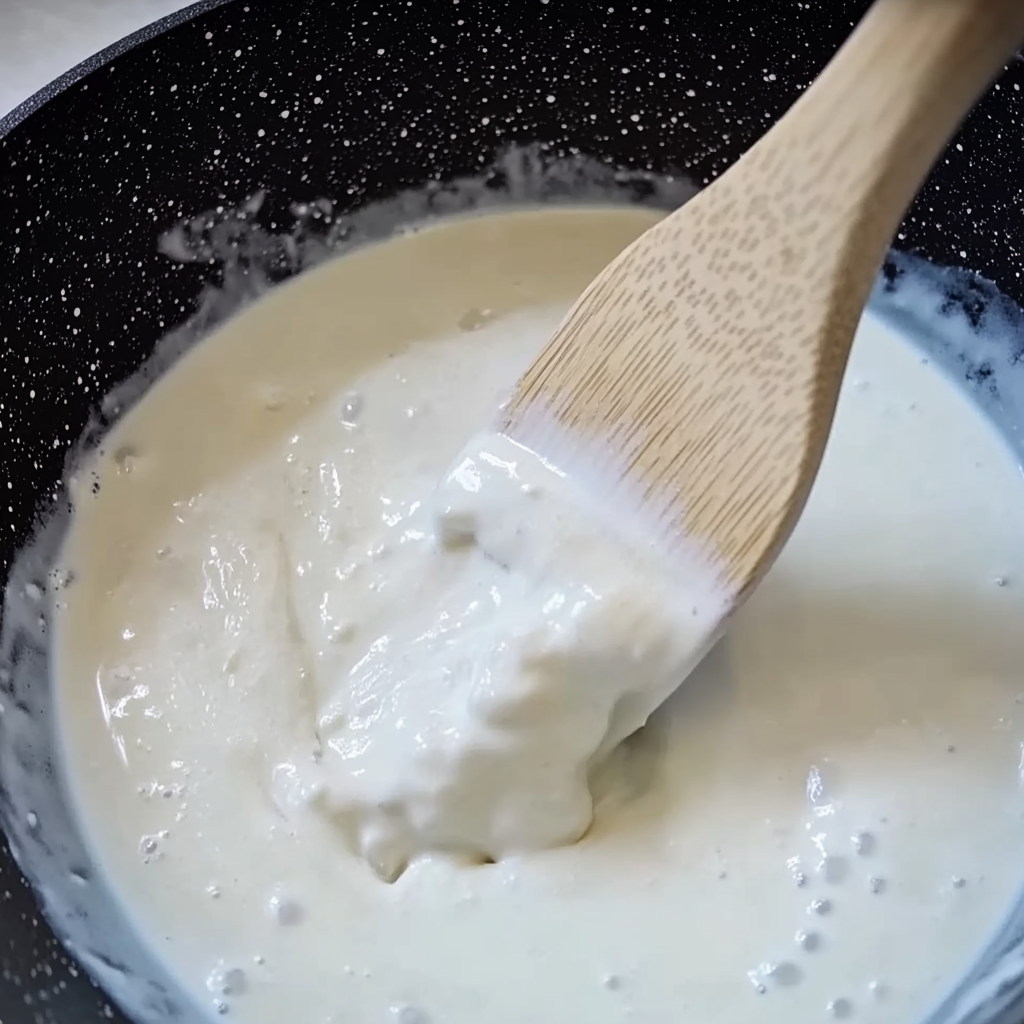
After 10 minutes, you will see the mixture getting thicker. After 15 minutes, it will coat your spoon. After 20 minutes, it will start to pull away from the sides when you stir. Keep cooking until the mixture forms a soft ball when you touch it. It should not stick to your fingers.
To check if it’s ready, take a small amount on your spoon and let it cool for a minute. Try to roll it between your fingers. If it rolls into a ball without sticking, it’s ready. If it’s still sticky, cook for 2-3 more minutes.
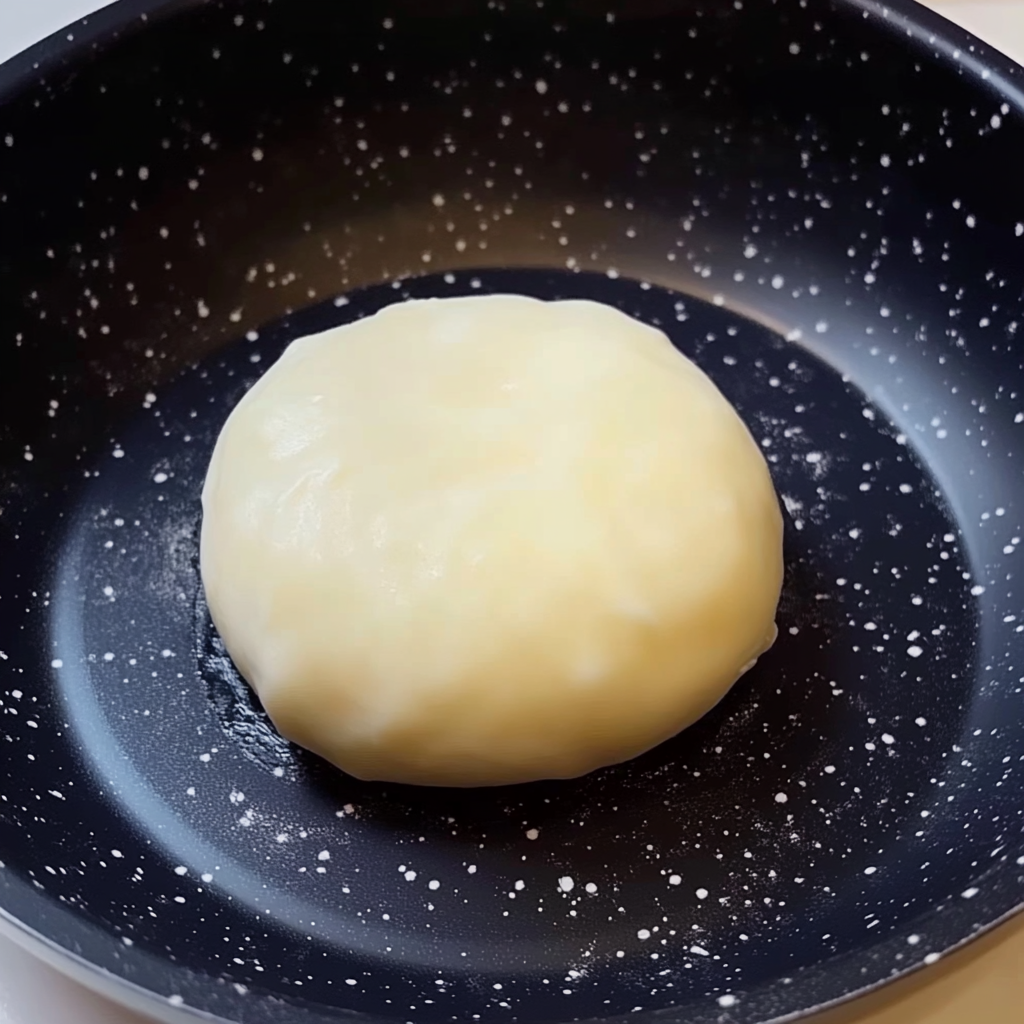
Turn off the heat. The mixture will be very hot, so be careful. Let it cool in the pan for 5 minutes first. Then put it on a plate and spread it out. Let it cool for another 10 minutes until it’s comfortable to touch. Don’t wait too long or it will become hard.
Wash your hands and dry them well. Take a small amount of mixture – about one teaspoon. Roll it between your palms in a circular motion. Apply gentle pressure. If the mixture cracks, it’s too cool – warm it slightly with your hands. If it sticks to your hands, let it cool a bit more. Make all balls the same size so they look nice.
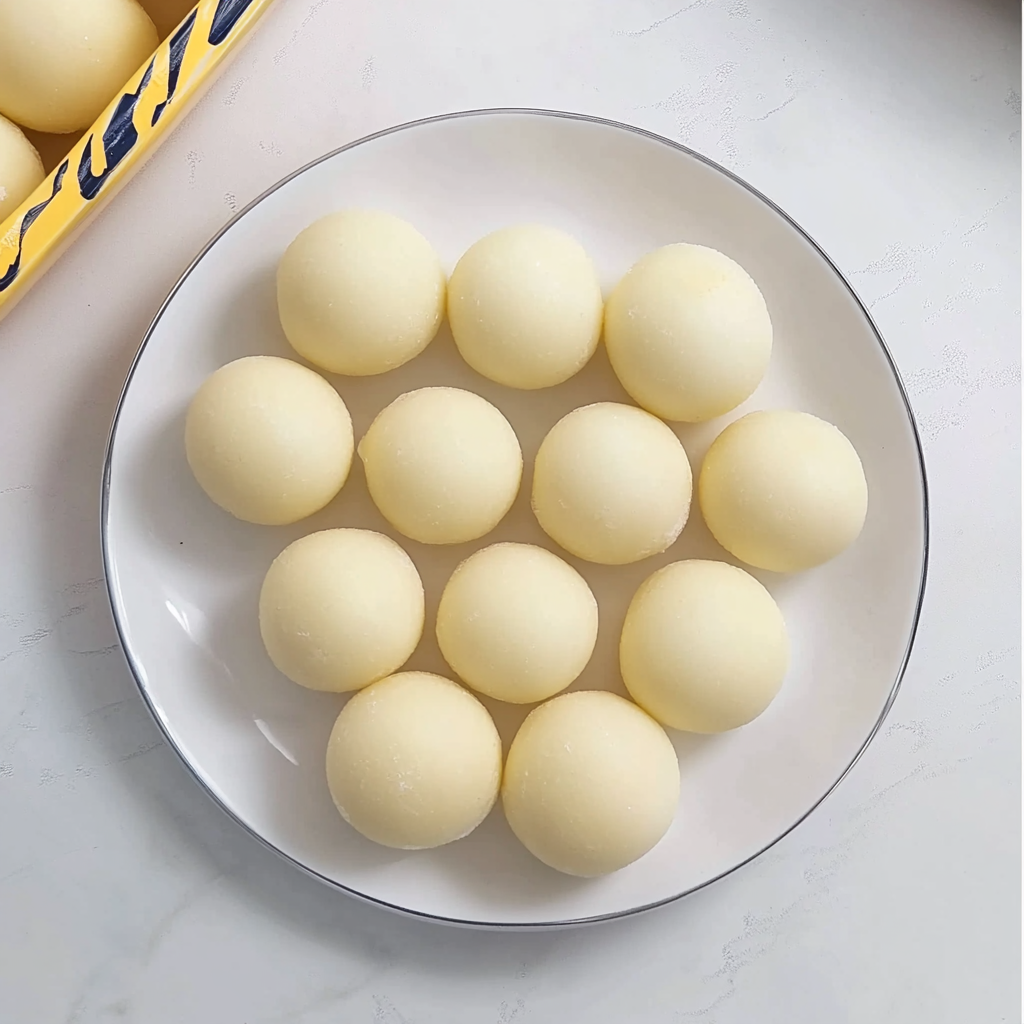
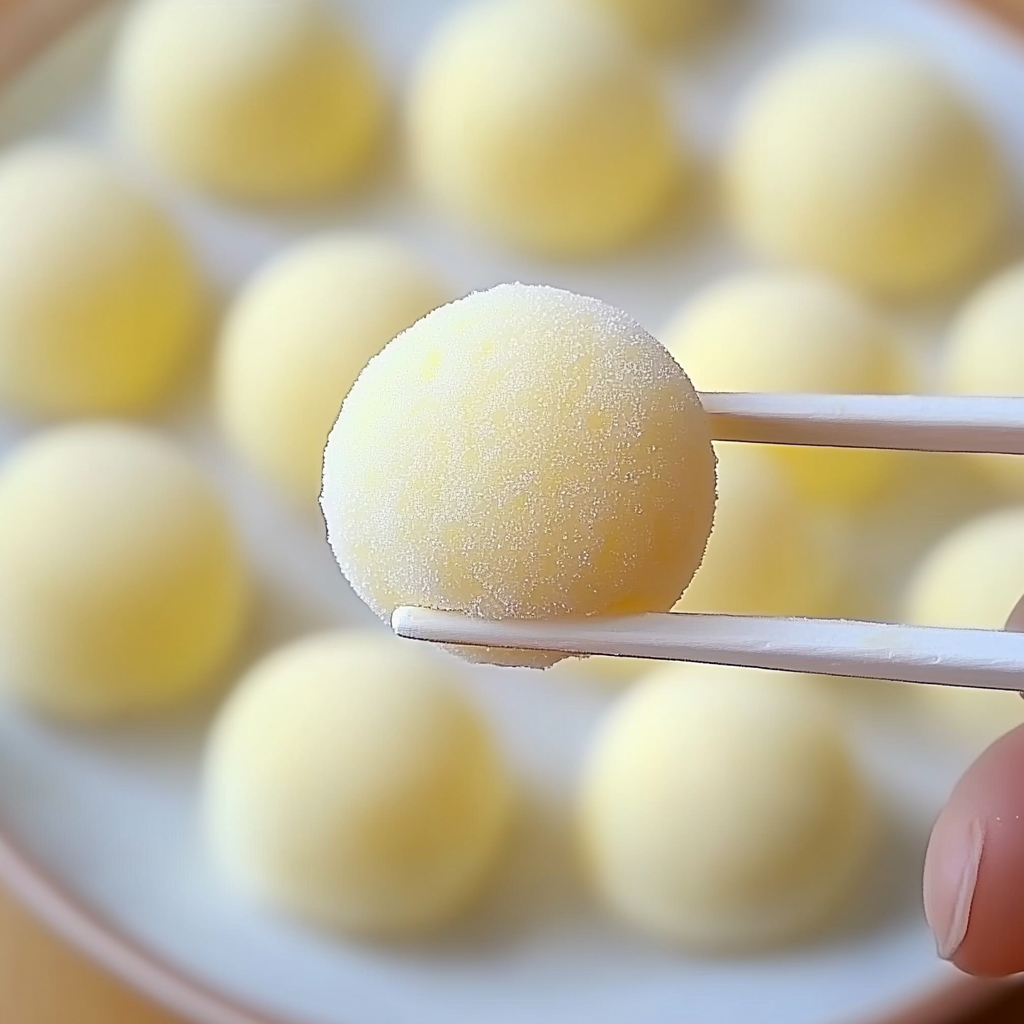
Put milk powder in a shallow plate. Roll each ball in the milk powder until it’s completely covered. Turn the ball around to make sure all sides are coated. The milk powder will stick to the balls and make them look white and pretty. Press gently so the powder sticks well.
Place the coated balls on a clean plate. Don’t let them touch each other or they might stick together. Let them sit at room temperature for 15-20 minutes. This helps the coating set and makes the balls firm. Now they’re ready to serve!
Tips for Perfect Milk Balls
Stir All the Time: Don’t stop stirring when cooking or the mixture will stick and burn.
Use Heavy Pan: A thick-bottomed pan works best. It heats evenly and doesn’t burn the milk.
Check the Thickness: The mixture is ready when it doesn’t stick to your hands and holds its shape.
Let it Cool: Wait for the mixture to cool before making balls or you will burn your hands.
Make Them Quickly: Shape the balls while the mixture is still soft. If it gets too cool, it becomes hard to shape.
Different Ways to Make Them
Sweet Milk Balls: Add one more tablespoon of sugar if you like them sweeter.
Flavored Balls: Add a few drops of vanilla or rose water when cooking.
Colorful Balls: Add a tiny bit of food coloring to make pink or yellow balls.
Coconut Coating: Roll balls in coconut powder instead of milk powder.
Storing Your Milk Balls
At Room Temperature: If you plan to eat the milk balls within 2 days, you can keep them at room temperature. Put them in an airtight container or cover them with a clean cloth. Make sure they are completely cool before storing. Keep them away from direct sunlight and heat.
In the Refrigerator: For longer storage, put the milk balls in the refrigerator. Use an airtight container or a covered box. They will stay fresh for 5-7 days in the fridge. Before eating, take them out 15-20 minutes early so they come to room temperature. Cold milk balls are hard and don’t taste as good.
Freezing: You can freeze milk balls for up to 2 weeks. Put them in a freezer-safe container with a tight lid. Place a piece of parchment paper between layers so they don’t stick together. To eat frozen milk balls, take them out and let them thaw at room temperature for 30-45 minutes.
Storage Tips:
- Never store warm milk balls – they will create moisture and spoil quickly
- If milk balls become hard in the fridge, leave them out for 20 minutes before eating
- Don’t store them with other strong-smelling foods as they will absorb odors
- Check them every 2 days – if you see any color changes or bad smell, throw them away
- Keep different flavored milk balls in separate containers so flavors don’t mix
Don’t worry if your first batch isn’t perfect. Making milk balls is a skill that gets better with practice. Each time you make them, you’ll understand the mixture better. You’ll know exactly when it’s thick enough and how to roll perfect balls.
So next time you want something sweet, skip the store-bought sweets and try making these milk balls. Your family will be impressed, your taste buds will be happy, and you’ll feel proud knowing you made something delicious with your own hands.
Happy cooking, and enjoy every sweet bite of your homemade milk balls!
Easy Milk Balls Recipe – Sweet Indian Treats
Ingredients
Equipment
Method
- Mix flour and sugar in small bowl, break any lumps with spoon

- Pour milk in heavy-bottomed pan and heat on medium until warm and steaming, watch carefully so it doesn't overflow

- Remove pan from heat, add flour mix one spoon at a time while stirring quickly to prevent lumps, then return to low heat
- Stir without stopping for 20-25 minutes using wooden spoon, scrape bottom of pan as mixture gets thicker slowly
- Mixture should pull away from sides and small amount should roll without sticking to fingers, if sticky cook 2-3 more minutes

- Turn off heat and cool 5 minutes in pan, then spread on plate and cool 10 more minutes until comfortable to touch
- Roll small amounts (1 tsp) between clean, dry palms to make marble-sized balls

- Roll each ball in milk powder to cover all sides completely, press gently so powder sticks

- Place on plate without touching each other and let sit 15-20 minutes at room temperature, then ready to serve

Notes
- Never Stop Stirring: Mixture will burn if you don’t stir constantly
- Use Heavy Pan: Prevents burning and heats evenly
- Test Readiness: Mixture should roll without sticking to hands
- Work Quickly: Shape balls while mixture is still soft
- Clean Hands: Wash and dry hands before shaping
- Store only when completely cool
- Use airtight containers
- Keep away from strong smells
- Check every 2 days for freshness
Browse all my recipes and baking tips at my blog section – there’s always something delicious waiting for you!


❤️